How to Use Ghost and Copperx Together
A step-by-step guide on how to use Ghost and Copperx together to accept cryptocurrency payments
Are you running a membership site on Ghost? If so, integrating Copperx directly with your Ghost site can streamline your payment process and enhance your user experience. With just a few simple steps, you can easily create Copperx Payment buttons on any Ghost site and provide premium membership access to your customers.
The best part? This integration takes only a few minutes to implement and requires no coding skills whatsoever. In this guide, we'll show you exactly how to do it. So, sit back, relax, and let's get started!
We've divided this article into two part
- Integrate Crypto Payment
- Create and manage Membership for your crypto subscribers
**Part 1 ** Integrate Crypto Payment
Follow the below steps to integrate Copperx into your ghost site.
Step 1: Create & Setup a Copperx Account
- Getting started with Copperx is quite simple; you just need to visit copperx.io and follow a few registration steps.
- Once you have created an account, go to Dashboard > Settings > Withdrawal Addresses to set up your crypto wallet address as a payment-receiving address.
- This will enable you to effortlessly receive customer payments into your preferred account.
Step 2: Create a Payment Link
Copperx's payment link feature offers a secure and hassle-free way to accept payments online, eliminating the need to set up a payment gateway. This feature allows payment links to be conveniently sent to your customers via email, messaging apps, or social media platforms. It takes the customer to a payment page where they can enter their payment information and complete the transaction. This makes it easy for customers to pay you for your products or services and saves you the time and effort of manually processing payments.
To Create a Payment Link :
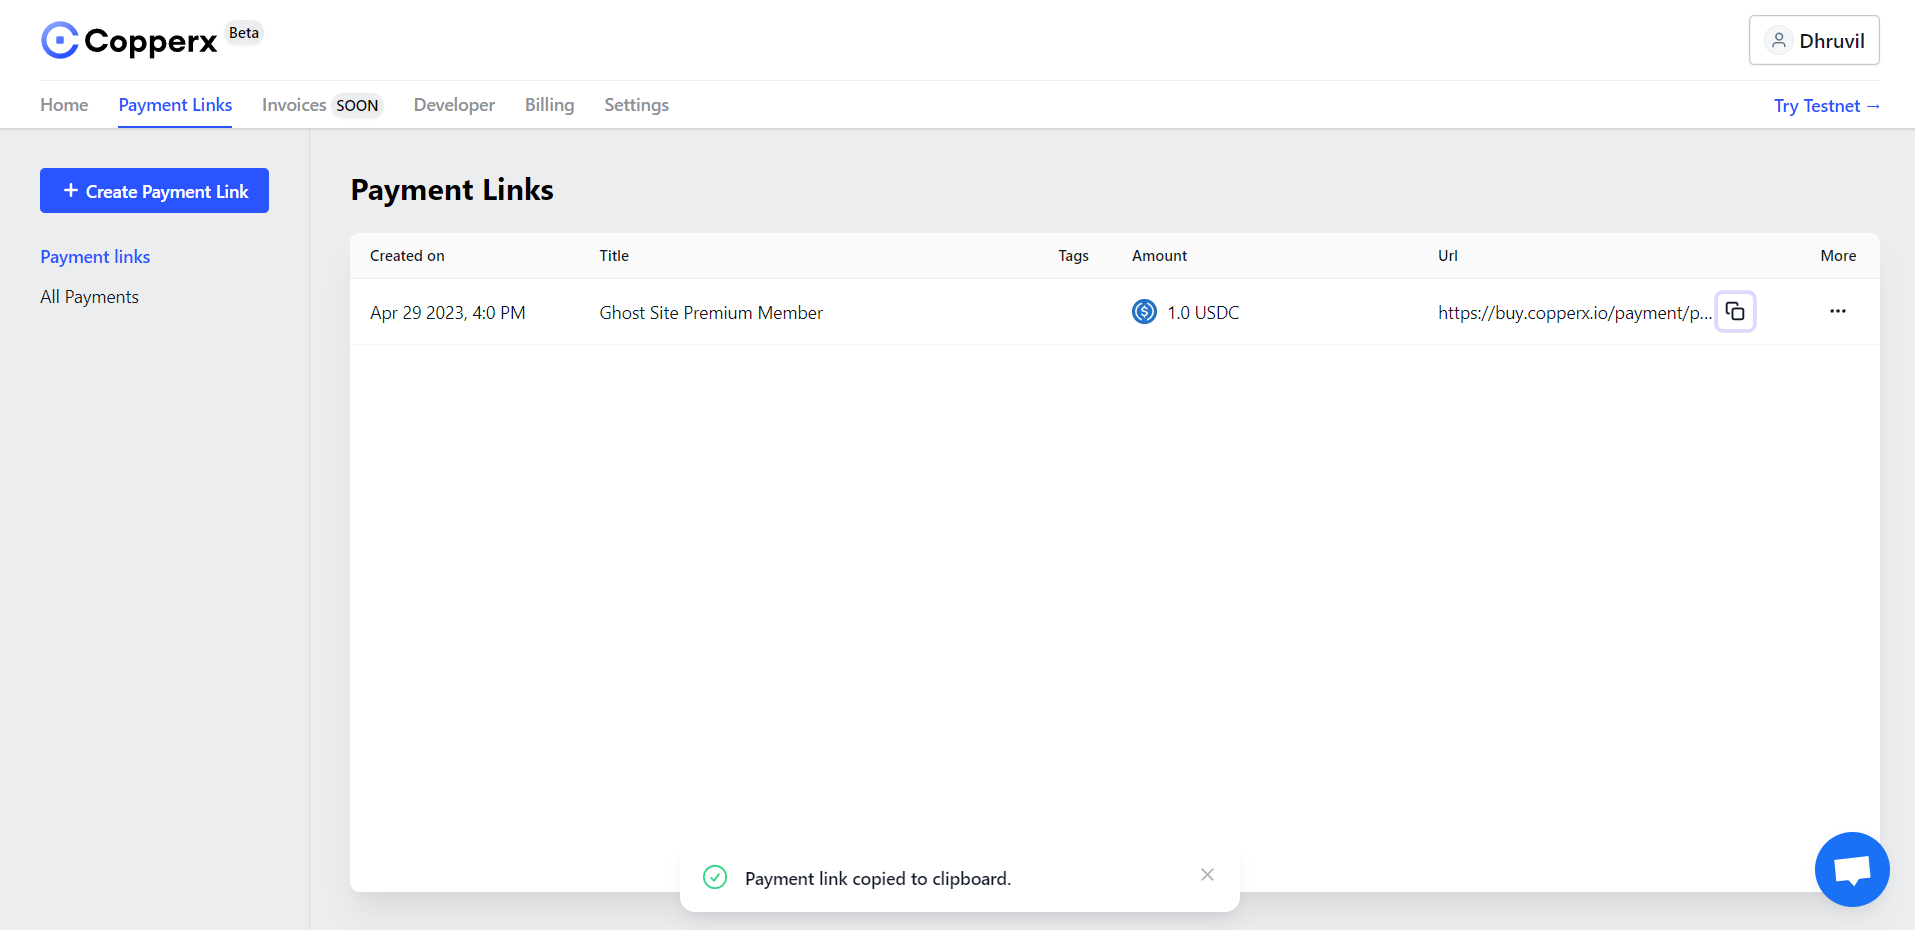
- Open your Copperx dashboard and navigate to the Payment Link tab.
- Now click on Create Payment Link button and choose the link type as per your business needs. Select your preferred token and fill out the amount, title, and description of your product or service.
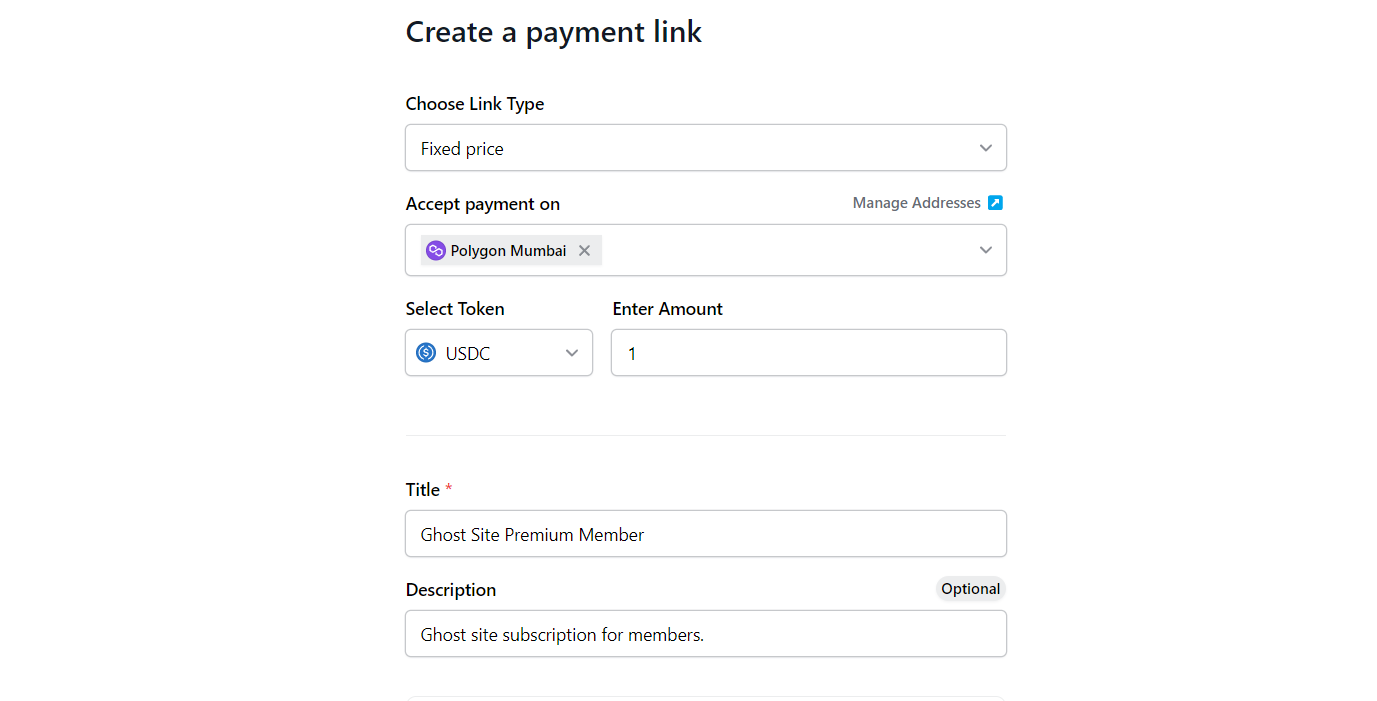
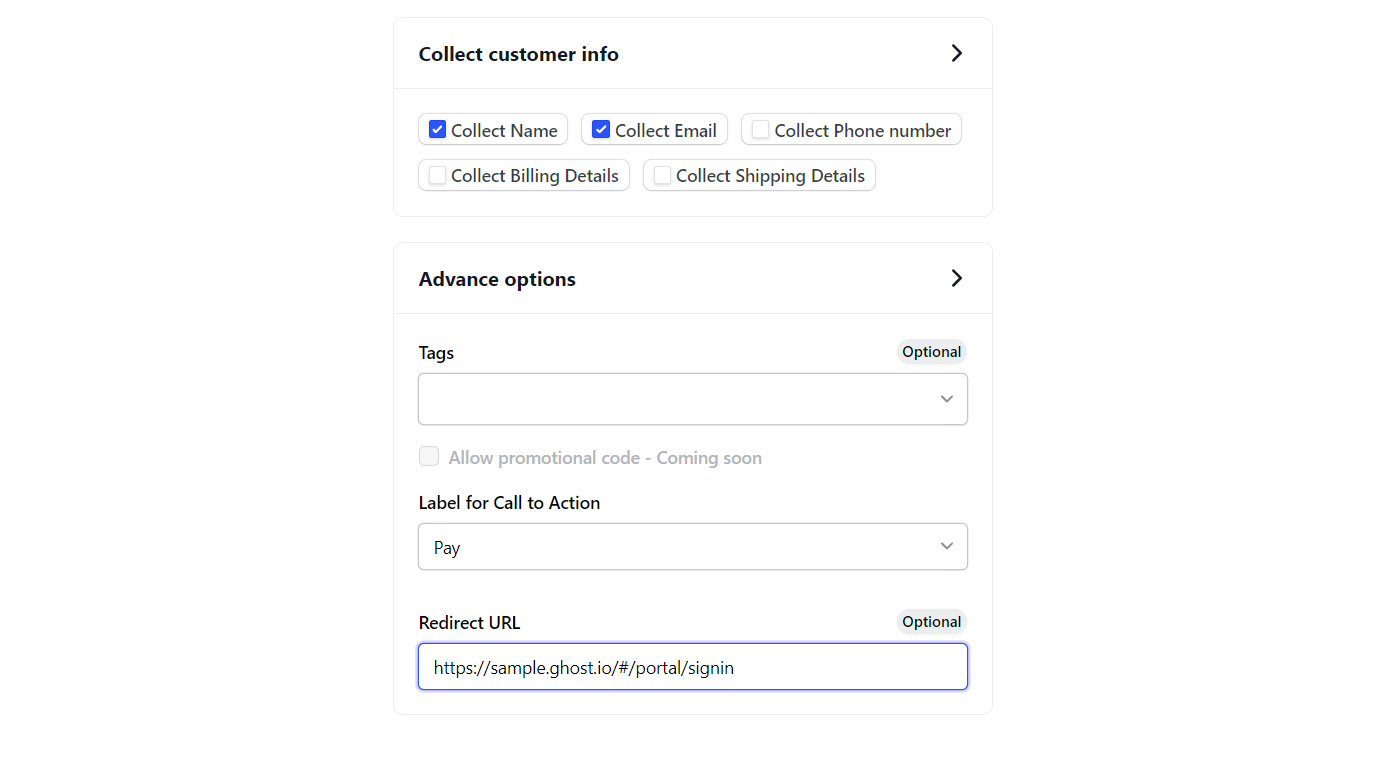
- In the Customer Info section, choose to collect the customer's name, email, and other required details. In the Advance Options section, add "Redirect URL," which will redirect the customer to that URL after the successful payment. For example, you can add a Ghost site URL or a Sign In page URL.
- Once you have filled in the necessary details, simply click on the Submit button to generate your payment link and copy that link from the payment links page.
Step 3: Integrate Crypto payment in Ghost
We've two methods to integrate Copperx
- Payment Button in Editor
- Navigation Menu in Ghost site
1. Payment Button in Editor
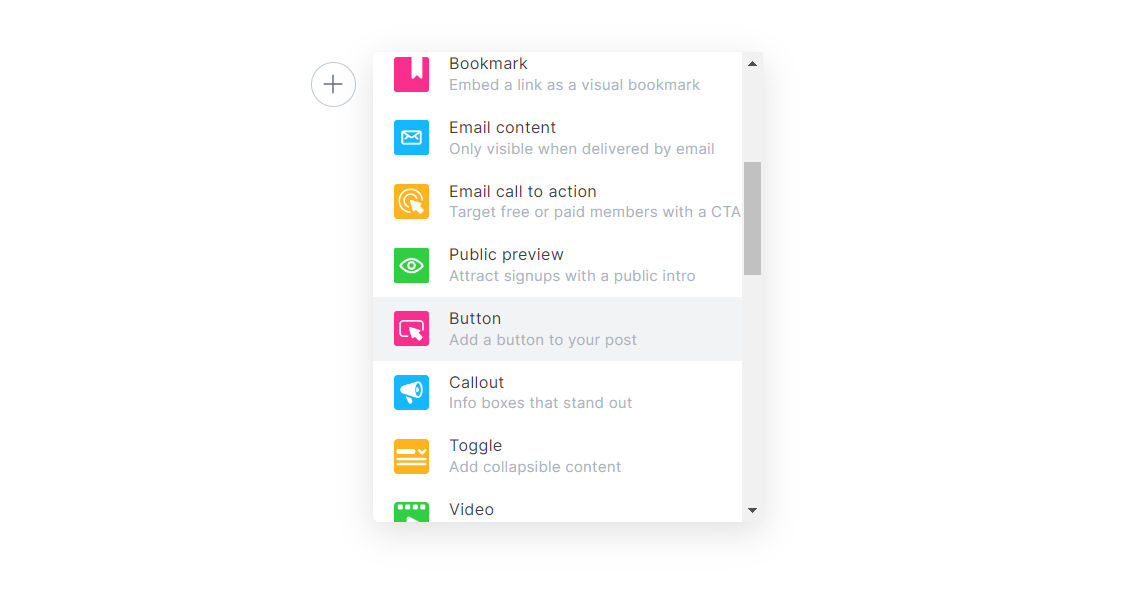
In Ghost's editor, you have access to a variety of snippets such as HTML cards, Markdown cards, Buttons, and many more. These snippets can be easily added to your content to enhance its functionality and appearance.
To add a Payment Button :
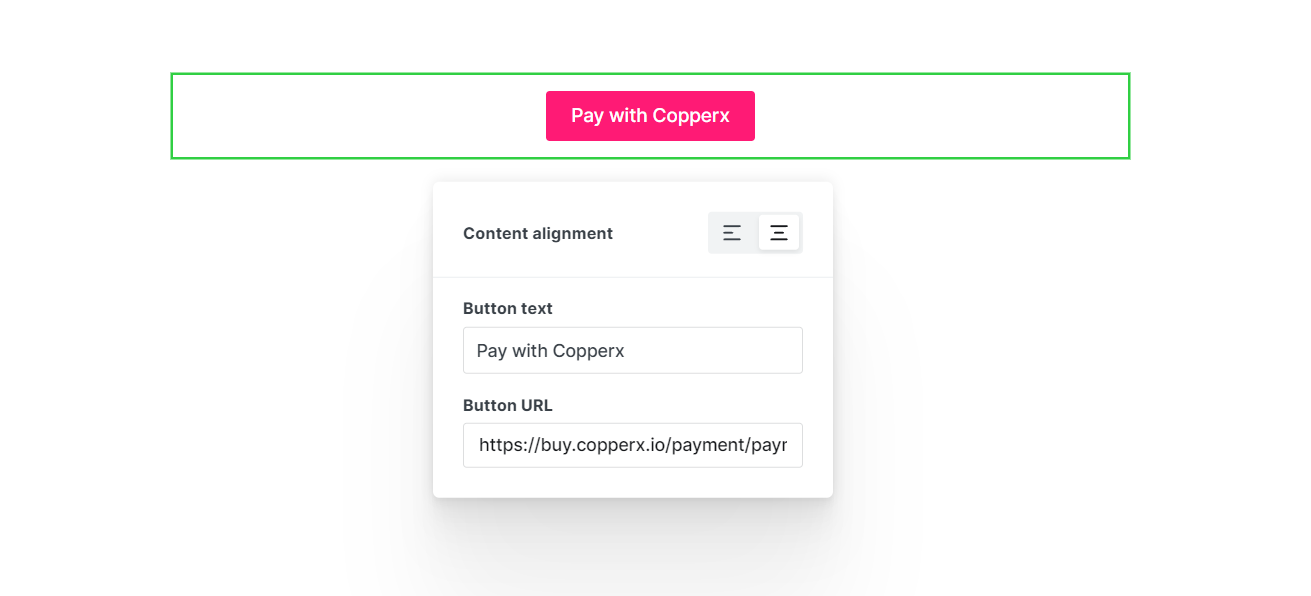
- Open the list of snippets in your editor and select Button as a snippet.
- Fill in the Button URL field with the copied payment link and add your desired Button text. For instance, you can use text such as "Pay with Copperx" to make it clear and easy for customers to initiate payments.
2. Add a New Navigation menu to Accept Payment
Navigation settings in Ghost allow you to customize the menus and links on your website. With Navigation settings, you can add, edit, and delete navigation items and control the order in which they appear on your site.
To add a new Navigation Tab :
- Go to your Ghost site Settings > Navigation > Primary Navigation, add new navigation with a label like "Subscribe with Crypto, " and add your copied payment link as the navigation link.
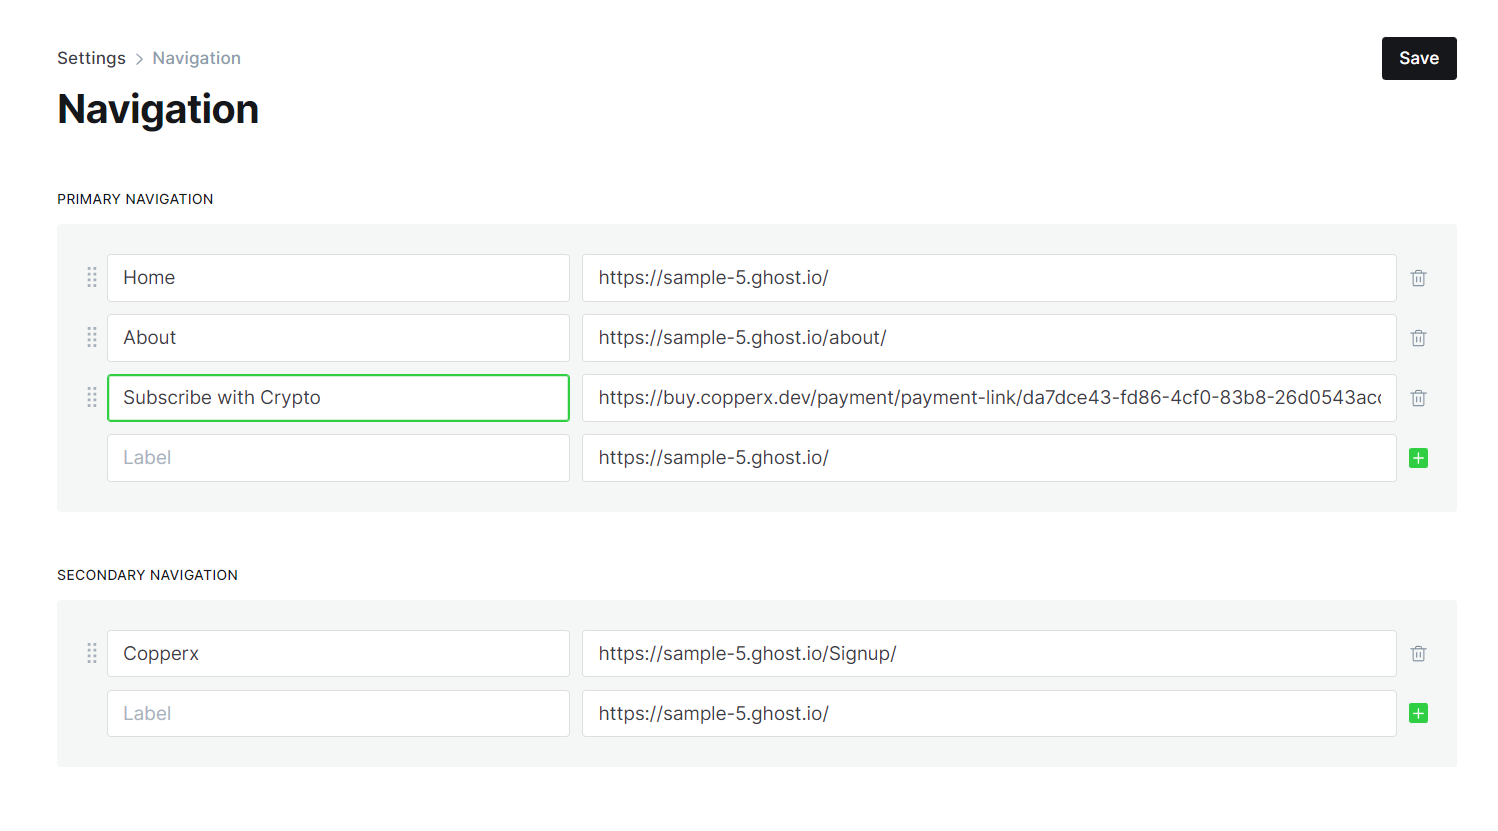
- Now click the Save button to see the new navigation menu on your Ghost site.

Part 2 Create and Manage Membership for your crypto subscribers
Follow the below steps to add a member to your subscription list automatically
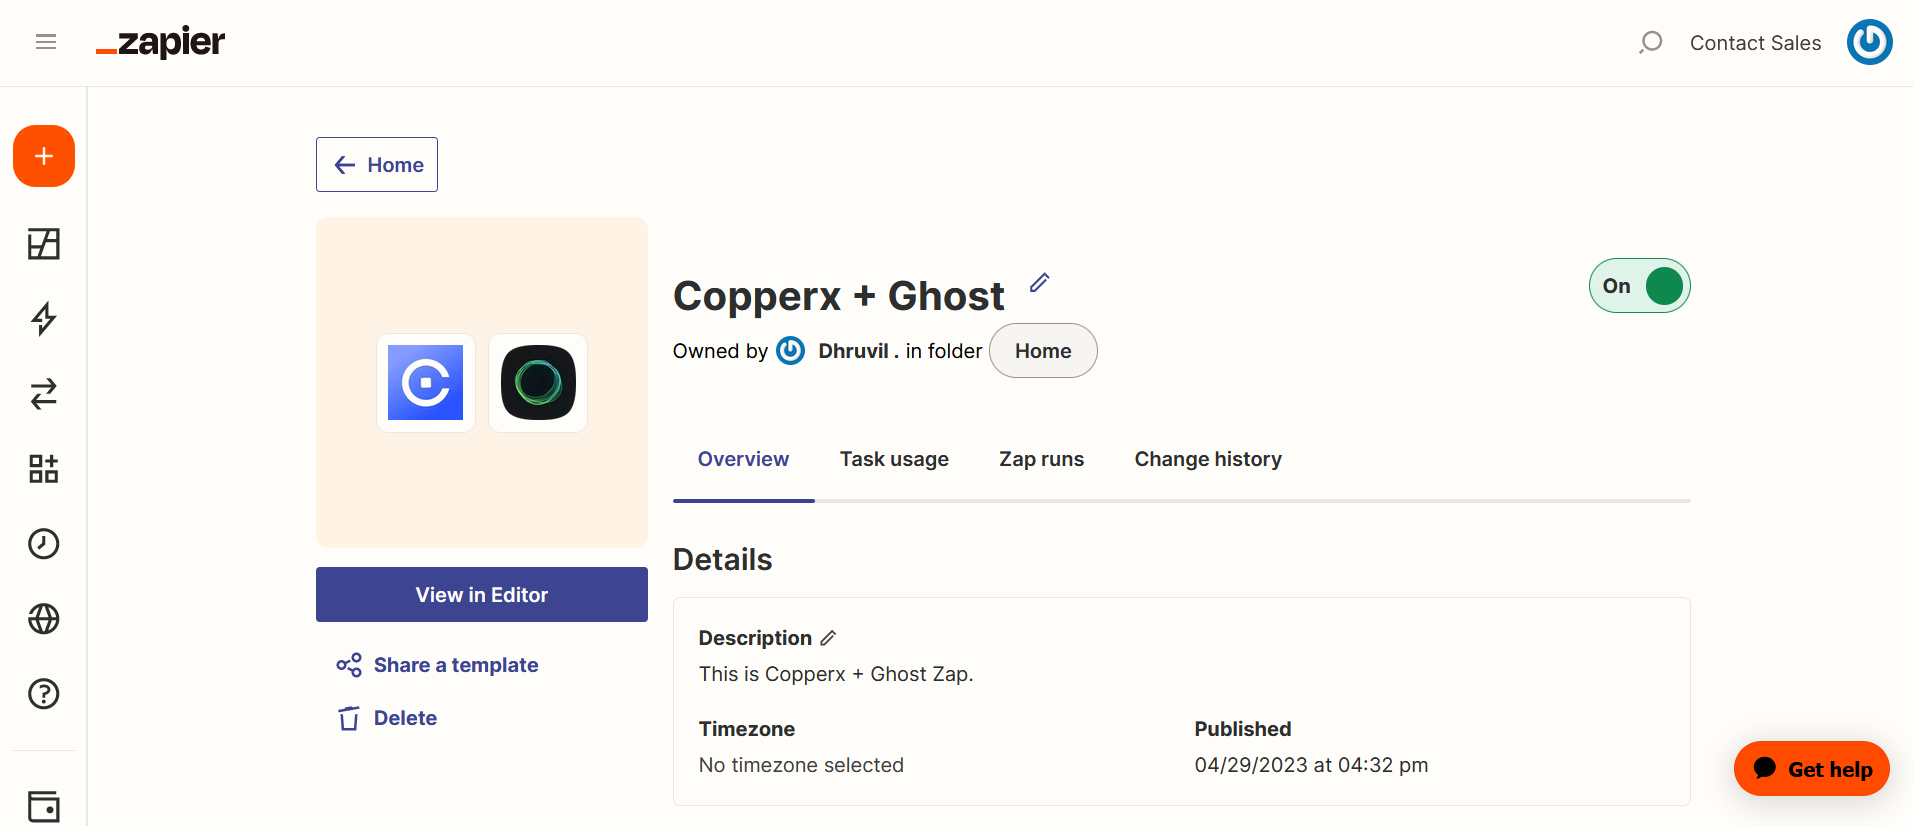
Step 1: Create a Zapier Automation
Zapier is a web-based automation tool that allows you to connect different apps and automate workflows. With Zapier, we can connect Copperx with your Ghost site and enhance the functionality of your Ghost site so that whenever a customer makes a payment via Copperx, Zapier can automatically trigger your defined action on your Ghost site.
To create Zapier automation for member creation in the Ghost site:
- Log in to your Zapier account and click on the Create Zap button from the Sidebar.

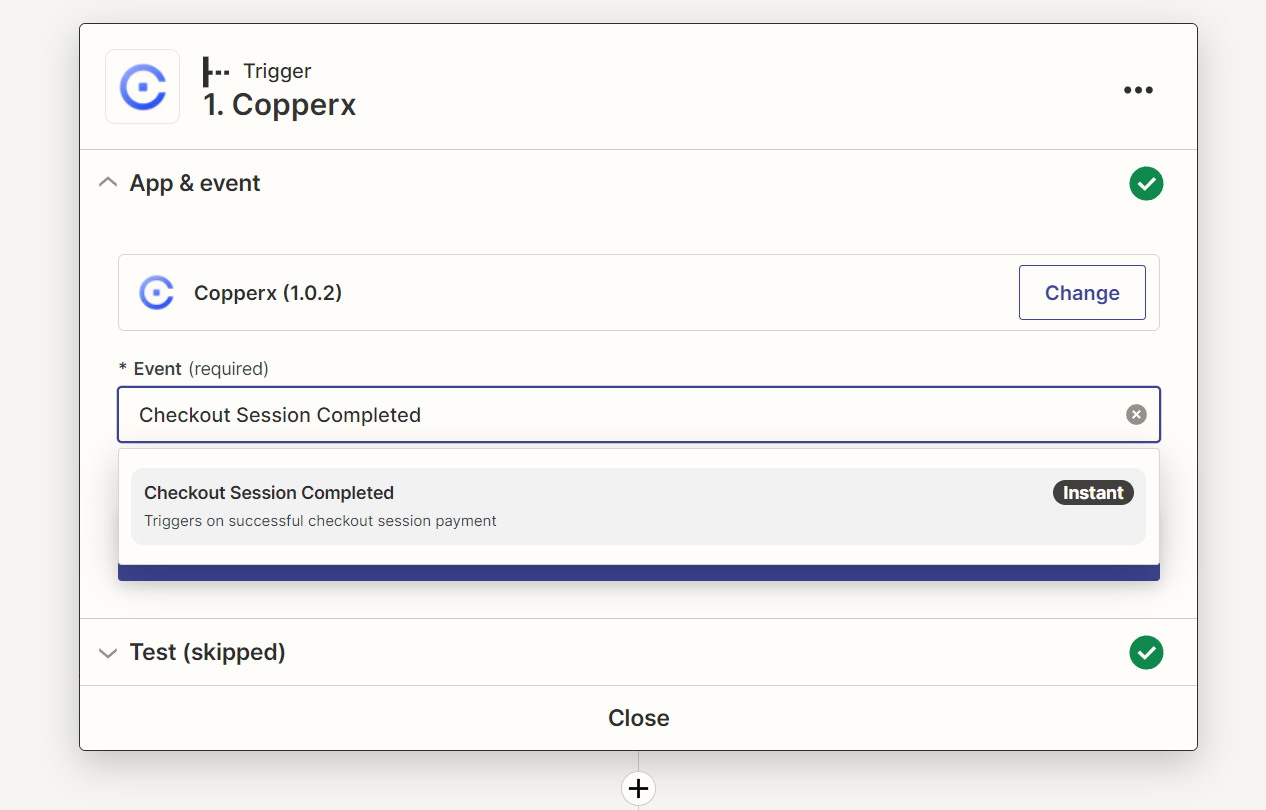
- Now in the Trigger, search for the "Copperx" app and select Checkout Session Completed as the event and click Continue.
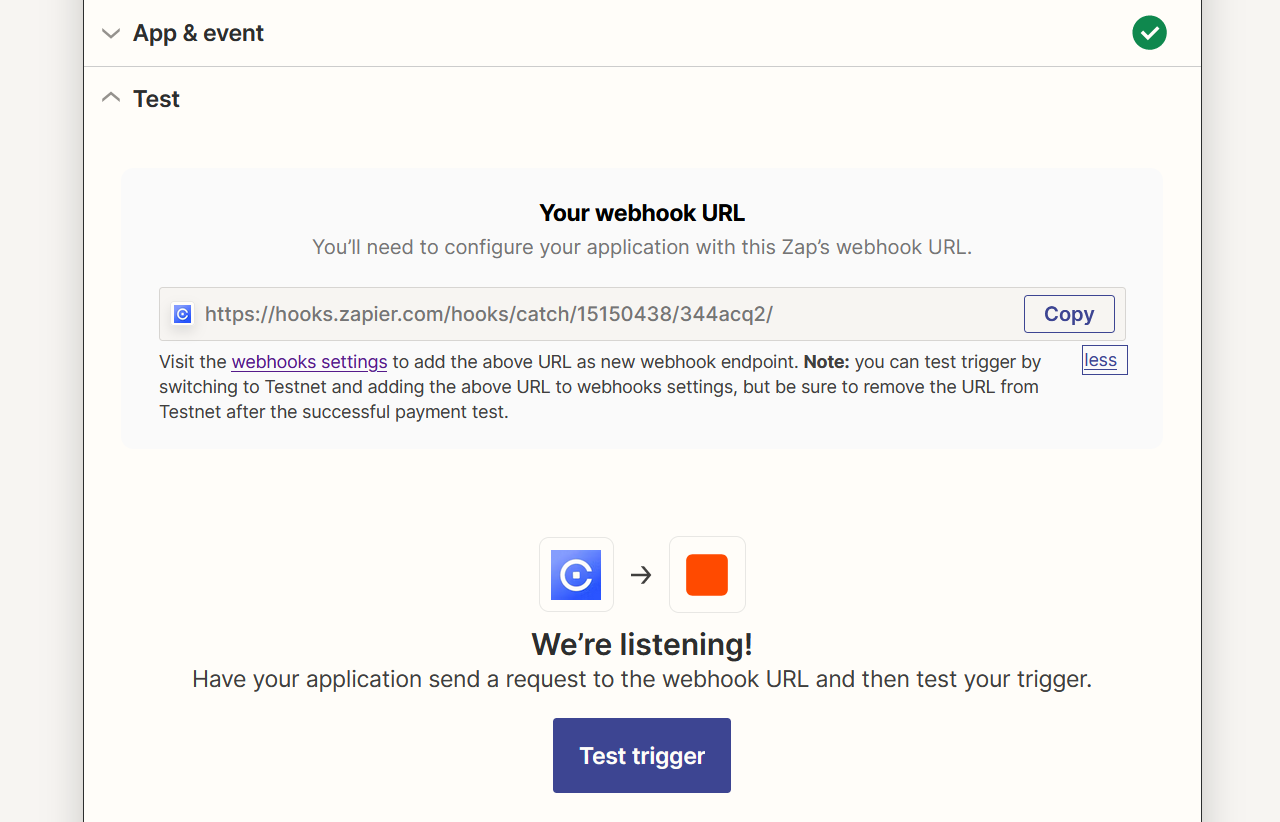
- Next is to test the trigger, for that you need to copy the webhook URL and add it to the Copperx webhooks settings as new webhook endpoint. (Note : you can test trigger by switching to Testnet and adding the copied URL to webhooks settings, but be sure to remove the URL from Testnet after the successful payment test.)
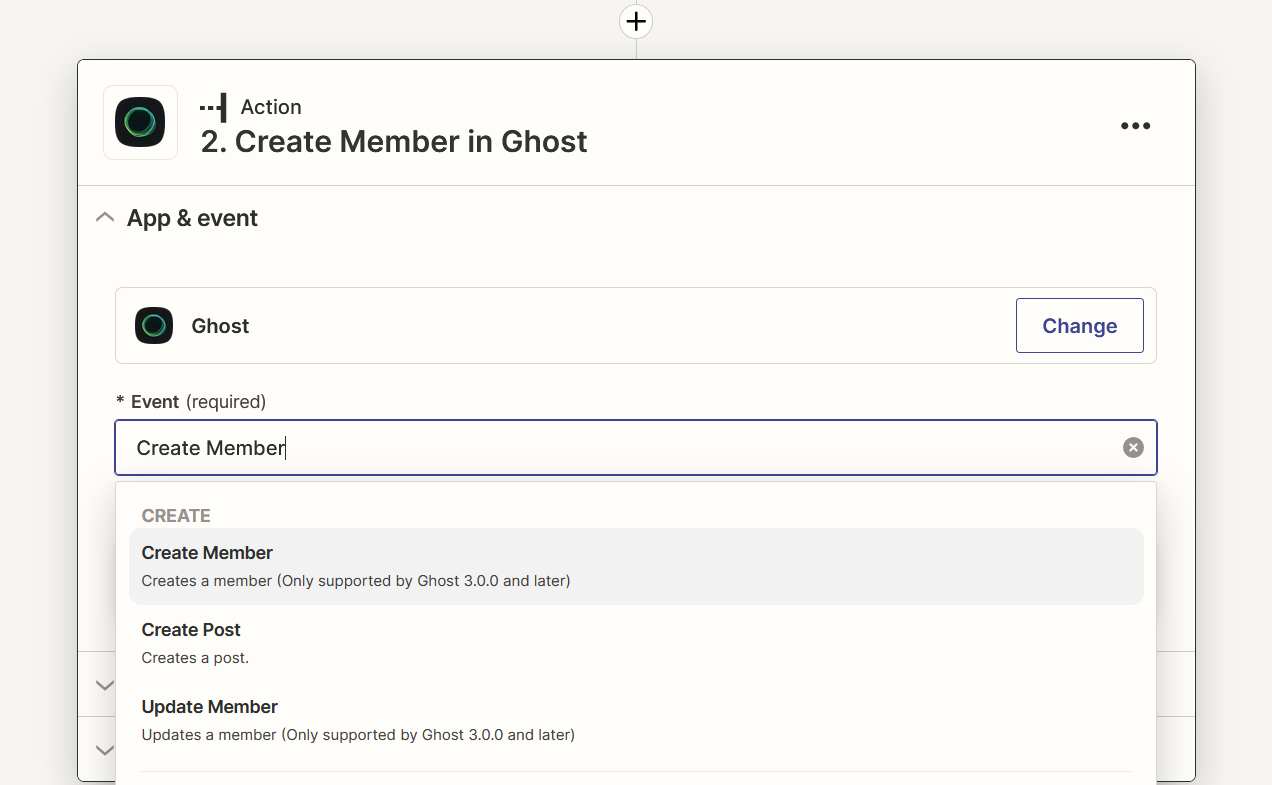
- Now in the Action, search for the "Ghost" app and select Create Member as the event and click Continue to login to your Ghost account.
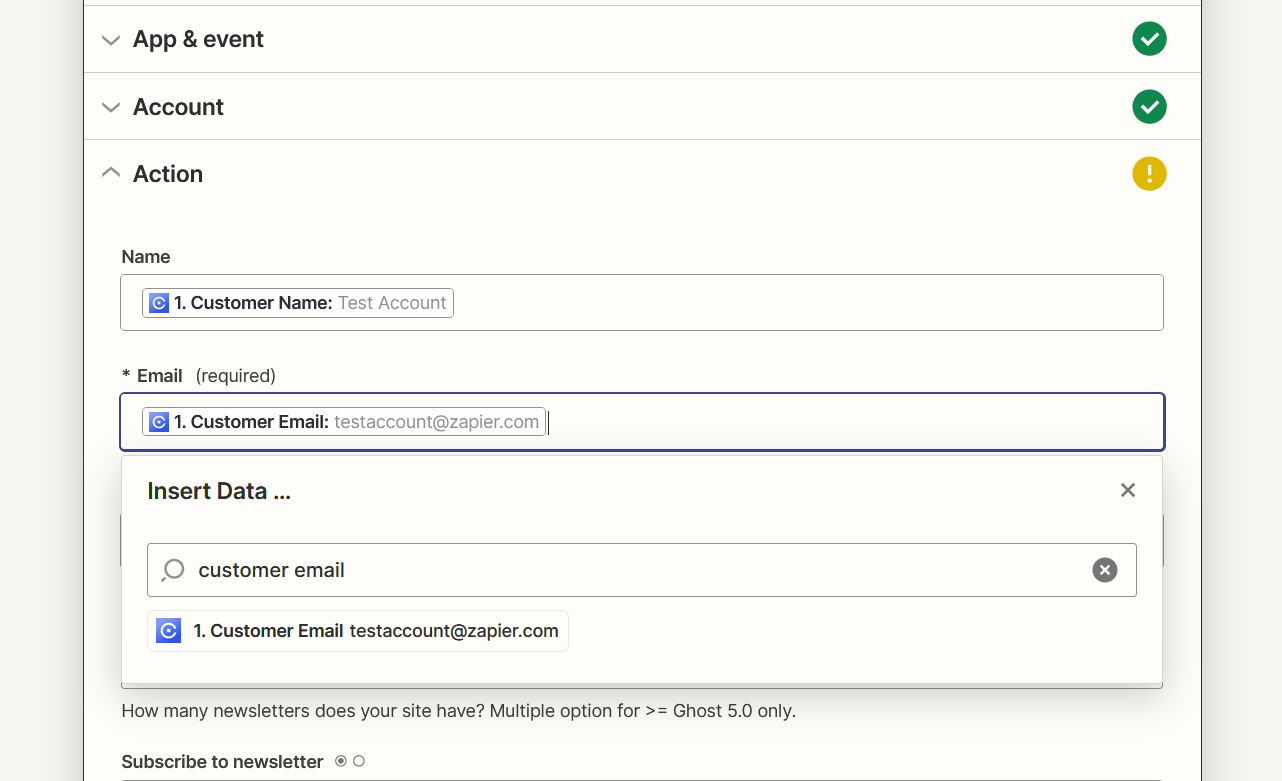
- Next you need to fill the Name field as the "Customer Name" and Email field as the "Customer Email" from the given option data and fill other relevant fields as per your Ghost site.
- At this stage, you can test your Zap and Publish it.
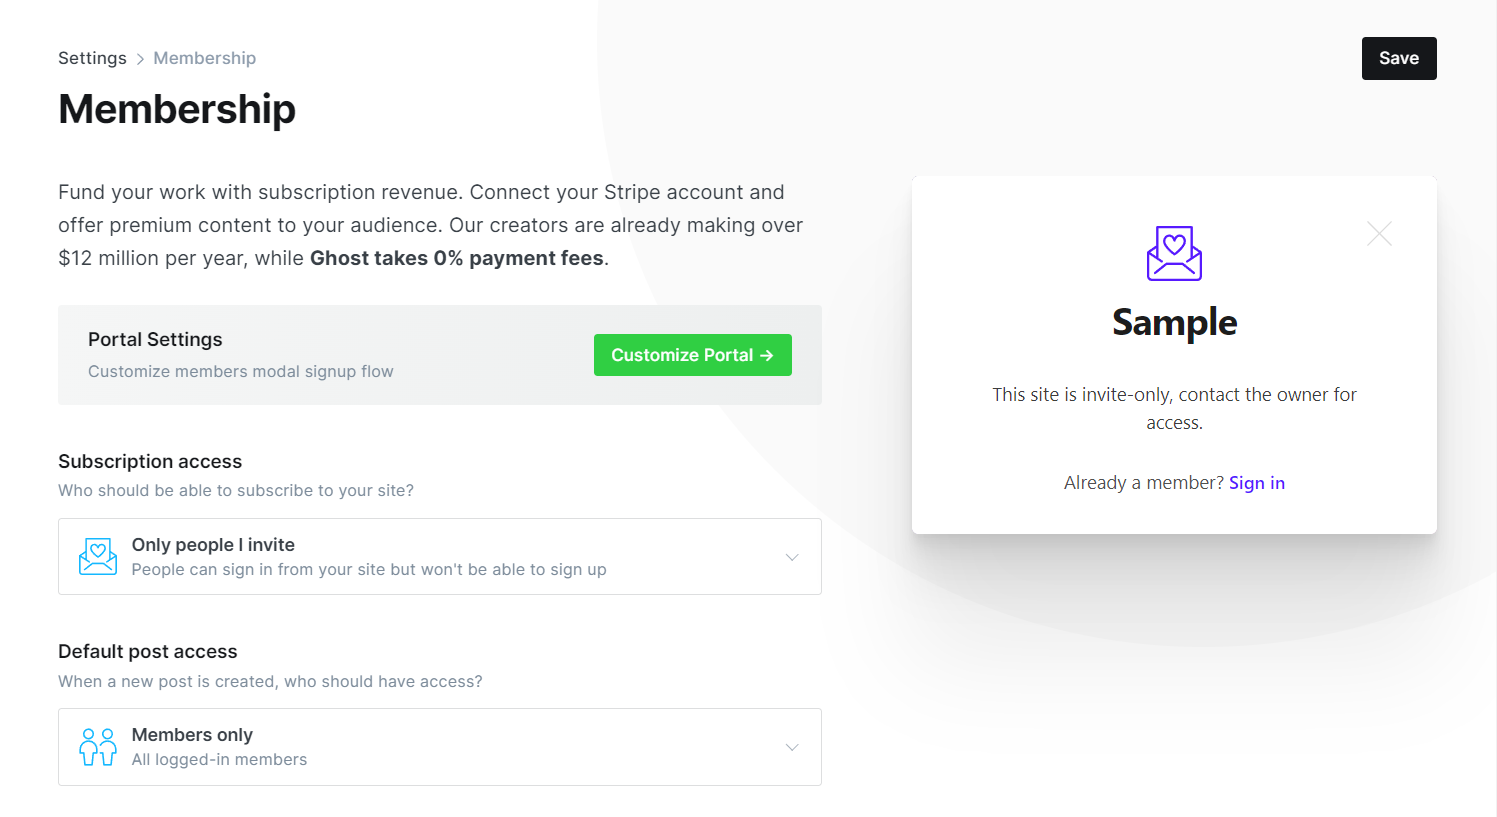
Step 2: Change Membership Settings
Ghost site Membership settings allow you to create and manage membership plans for your website. With Membership settings, you can offer different access levels to your content and control who can view and interact with different sections of your site.
To change Membership Settings :
- Go to your Ghost site Settings > Membership, set Subscription access to "Only people I invite," and change your Default post access to "Members Only".
Now, when a customer makes a payment, they will become a member and can access your premium content.
We hope this tutorial has been helpful in guiding you through the process of integrating Copperx with your Ghost site. By following the steps outlined in this tutorial, you can easily create and manage payment buttons on your site, allowing you to focus on delivering high-quality content to your customers.
Thank you for taking the time to read this blog post. If you have any questions or feedback, please feel free to reach out to us.